Bootstrap Checkbox State
Introduction
In some cases the elementary items might actually get very important-- most especially once you come to need them. For instance precisely how do your visitors communicate with the pages you generate specifying a simple Boolean act-- simply just yes or no pertaining to a couple of the issues you should request, precisely how they do confirm the conditions and terms or line up a handful of the practical choices they might possess. We normally surpass this without paying enough of an attention to the element responsible for these kinds of activities but the Bootstrap Checkbox Field is certainly a very important element-- one our forms cannot actually do without.
Located in newest fourth edition of the Bootstrap platform we are presented with the
.form-check.form-check-label<div>.form-check.form-check-label<label><input>.form-check-inputTips on how to use the Bootstrap checkbox:
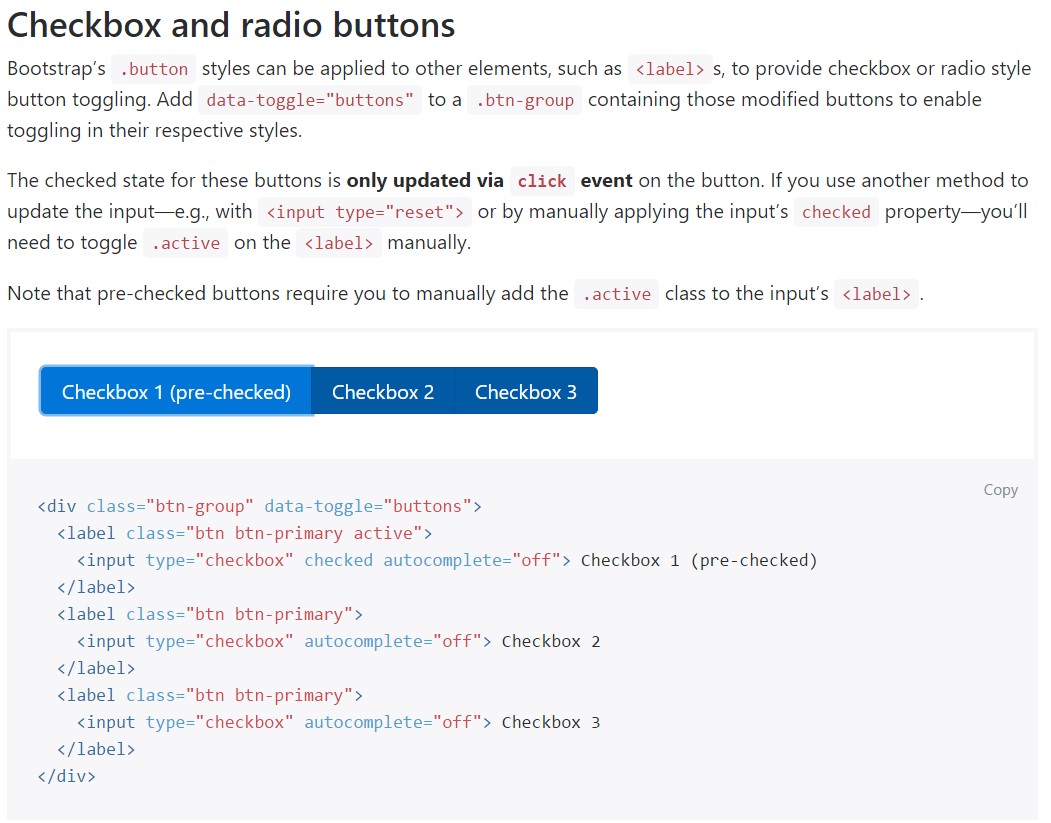
The checked status for all these buttons is only up-dated via click event on the button. If you work with some other approach to improve the input-- e.g., with
<input type="reset">.active<label>
<div class="btn-group" data-toggle="buttons">
  <label class="btn btn-primary active">
    <input type="checkbox" checked autocomplete="off"> Checkbox 1 (pre-checked)
  </label>
  <label class="btn btn-primary">
    <input type="checkbox" autocomplete="off"> Checkbox 2
  </label>
  <label class="btn btn-primary">
    <input type="checkbox" autocomplete="off"> Checkbox 3
  </label>
</div>
From time to time we require the checkboxes to be in our forms without the site visitor truly having the capacity to bring any kind of practice selecting them-- that is generally where the disabled option appears.
Just to disable correctly a checkbox in Bootstrap 4 applying the typical HTML attribute
disabledIn the case that you appreciate the idea and actually desire to execute this you should certainly specify the
.disabled.form-checkOne more example
Anytime employing checkboxes, wrap all of them in a
<label>.custom-control.custom-checkboxWork with
.custom-control-input<input>As well employ two
<span>.custom-control-indicator.custom-control-description
<label class="custom-control custom-checkbox">
<input type="checkbox" class="custom-control-input">
<span class="custom-control-indicator"></span>
<span class="custom-control-description">Boots</span>
</label>
Bootstrap Checkbox Style forms
Default checkboxes and radios are raised upon with the assistance of
.form-checkThe disabled class will in addition lighten the message color to help signify the input's state.
A brand new thing for the Bootstrap edition 4 framework is the release of the so called custom form components. These are actually the same features we are familiar with within usefulness yet styled even more attractive and with the Bootstrap approach. By having them you can certainly bring in some excitement and style to your content by simply just delegating a handful of special classes to the controls you include in your forms.
To utilize customized checkboxes wrap them in a
<label>.custom-control.custom-checkbox<input>.custom-control-input<span>.custom-control-indicator.custom-control-descriptionFinal thoughts
That's pretty much everything you ought to do in order to put a checkbox feature inside your Bootstrap 4 powered site and incorporate certain customized flavor to it bring in it a nice appearances. Currently everything you need to do is repeat the drill until you've inspected all the checkboxes wanted are already on the web page.
Inspect a couple of video clip training relating to Bootstrap checkbox
Linked topics:
Bootstrap checkbox formal documentation
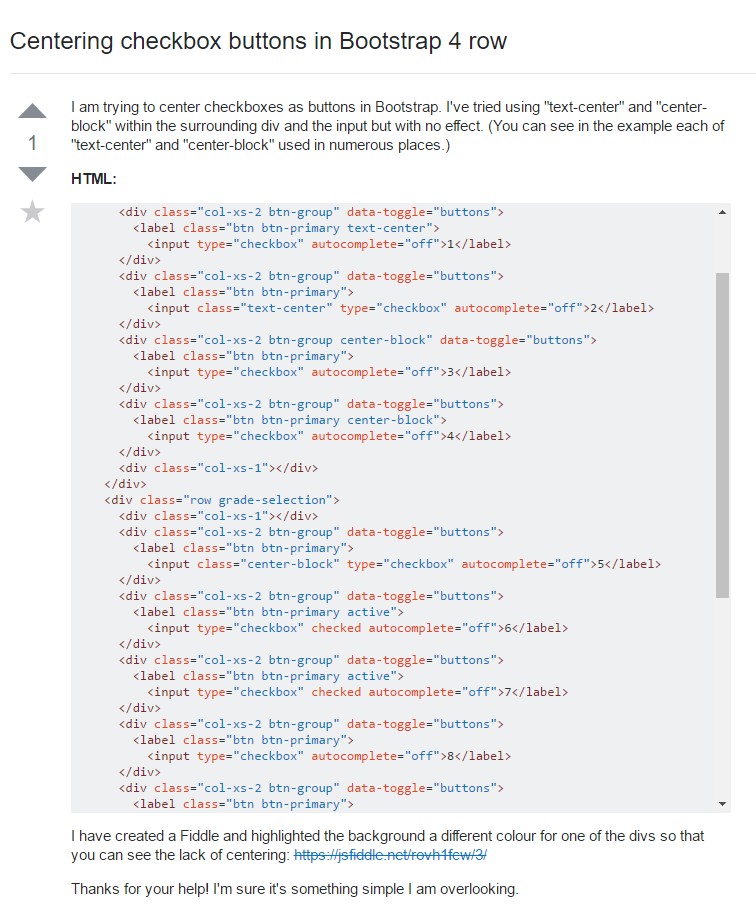
Centering checkbox buttons in Bootstrap 4 row
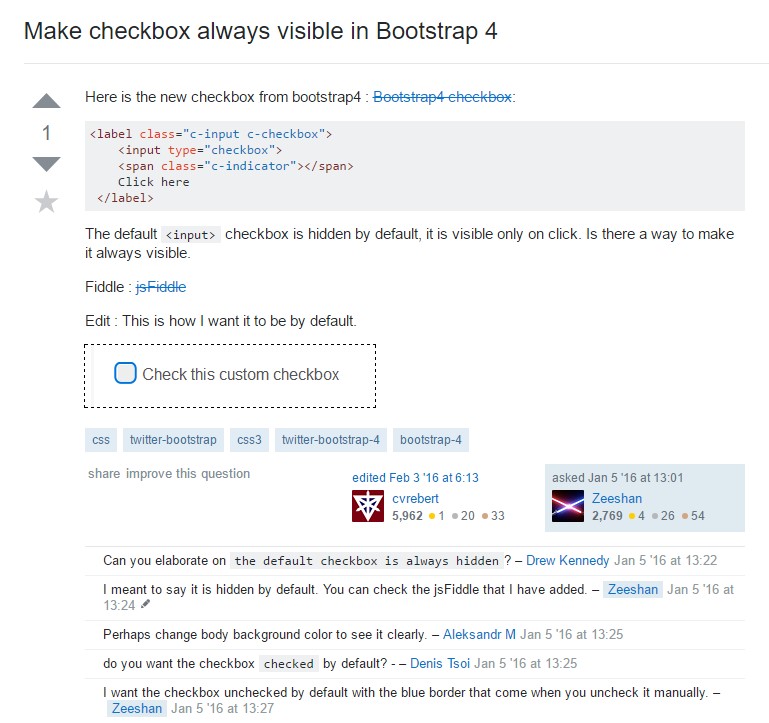
Make checkbox always visible in Bootstrap 4