JavaScript Image Gallery
Beautiful photo galleries
made easy!
Create web image galleries with a fancy overlay effect, in a few clicks without writing a line of code. Just drag and drop your photos into the a javascript gallery app window, press "Publish" and your own beautiful web gallery will open in the browser instantly! No html, javascript, css coding, no image editing, just a click to get your slideshow or gallery ready.
VisualLightBox is available as jQuery or Prototype plugin, for Windows and Mac, it is translated by volunteers to 28 languages!

Top Features
- Flickr & Photobucket support
- jQuery plugin or Prototype extension
- Floating and smooth cross-fade transition
- Slideshow with autostart option
- Windows & MAC version
- XHTML compliant
- Zoom effect with overlay shadow
- Rounded corners of overlay window
- Large images fit to browser window
- A lot of nice gallery themes
- Image rotating and hi-quality image scaling with anti-aliasing
- Automatic thumbnail creation
- Adding caption
- Built-in FTP
How to Use
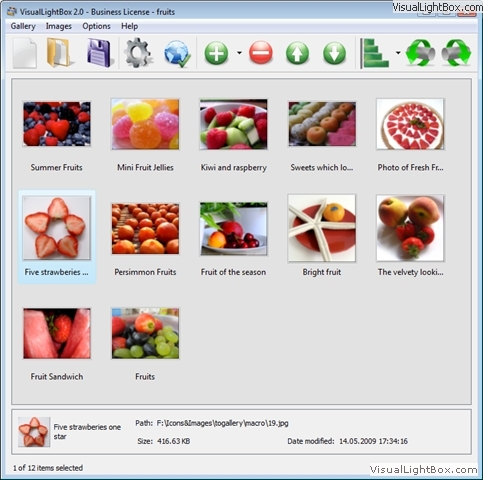
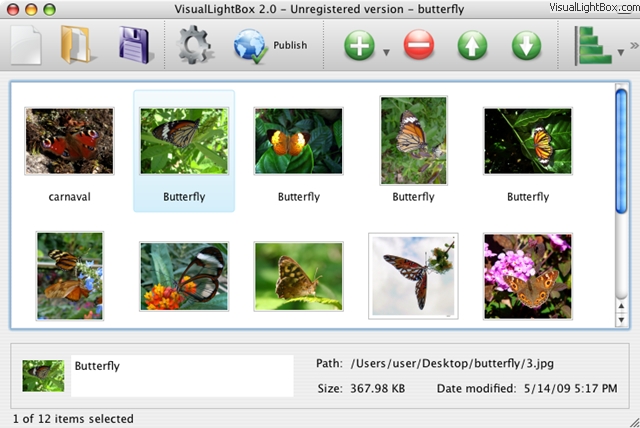
Step 1. Adding images to a javascript gallery.
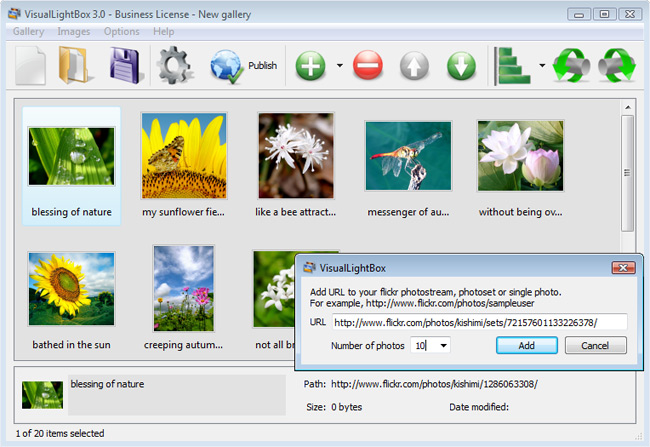
From the Images menu, select Add images.... Browse to the location of the folder you'd like to add and select the images. You can also use Add images from folder... and Add images from Flickr options.
A Javascript Gallery will now include these pictures. Or you can drag the images (folder) to the JavaScript Image Gallery window. The image is copied to your pictures folder and automatically added to your website gallery.
If you have included the photos that you do not wish to be in your web gallery, you can easily remove them. Select all images that you wish to remove from photo gallery, and select Delete images. from the Images menu. You can pick and choose pictures by holding the CTRL while clicking the a javascript gallery pictures you like.
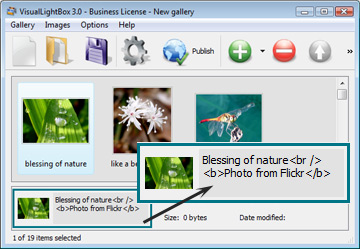
Step 2. Adding caption.
When you select an image you'll see the various information about it, such as:

Step 3 - Editing capabilities.
In this website gallery software you can easily rotate your pictures using "Rotate Left" and "Rotate Right" buttons.

Right click on the picture and select "Edit images.." item to open the selected picture in your default graph editor. You can adjust the color of pictures, as well as fix red-eye and crop out unwanted parts of an javascript transparency open window image.
Step 4. Gallery properties.
Change the name of your album, the size and quality of your dhtml window popup with transparent pictures with JavaScript Image Gallery . From the Gallery menu, select Properties or use "Edit Gallery Properties" button on the toolbar.
On the first tab of the Gallery Properties window you can change the name of your photo album and enable/disable the following properties: Slide Show, Auto play Slide Show, Zoom effect, Overlay Shadow. You can also set the pop up window floating dhtml Overlay shadow color and select the Engine you want to use (jQuery or Prototype + script.aculo.us).

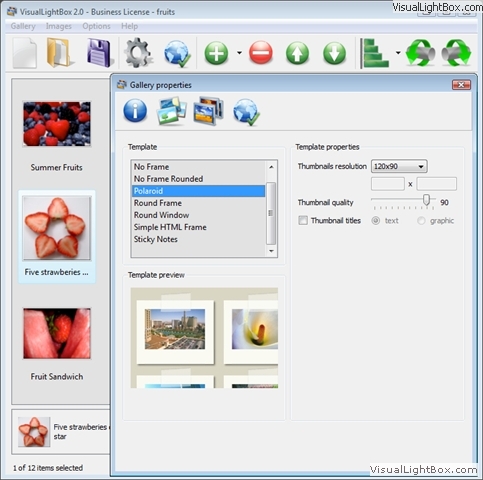
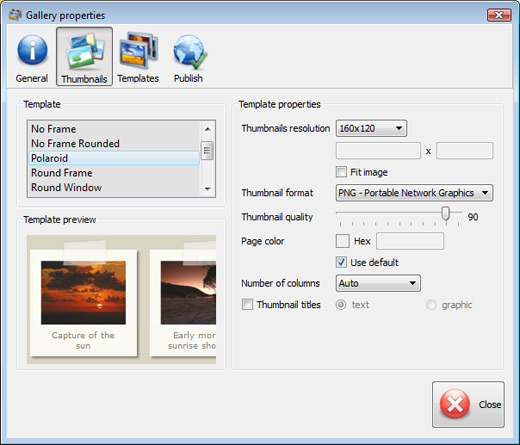
On the second tab of the Gallery Properties window you can select the thumbnail you want to use, set the Thumbnails Resolution, Thumbnails Quality, Thumbnails Titles. Select Thumbnails Format (save in PNG or JPG format). Specify the Number of columns in you photo album and the Page color.
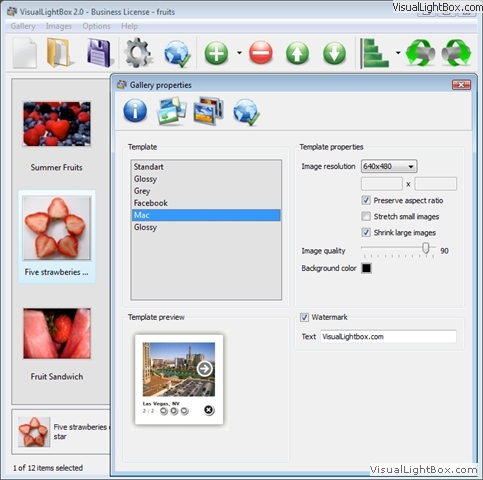
On the third tab of the Gallery Properties window you can select the template, Image resolution and Image quality of your pictures and change the Watermark.
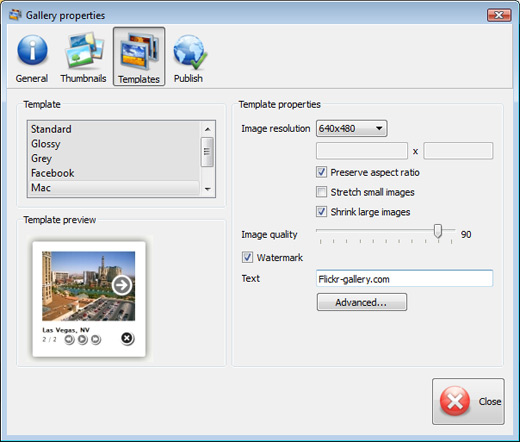
You can set up the various sizes for exported images.

Control the quality of output PNG or JPEG format image by defining output "Image quality" and "Thumbnail quality" parameters (0%...100%).

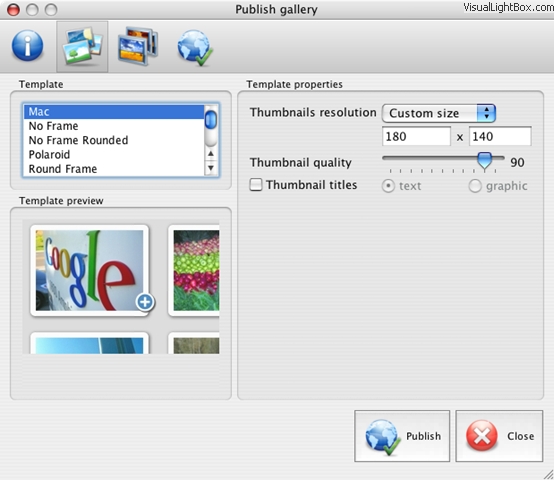
Step 5 - Publishing gallery.
When you are ready to publish your website photo album online or to a local drive for testing you should go to "Gallery/Publish Gallery". Select the publishing method: publish to folder or publish to FTP server.
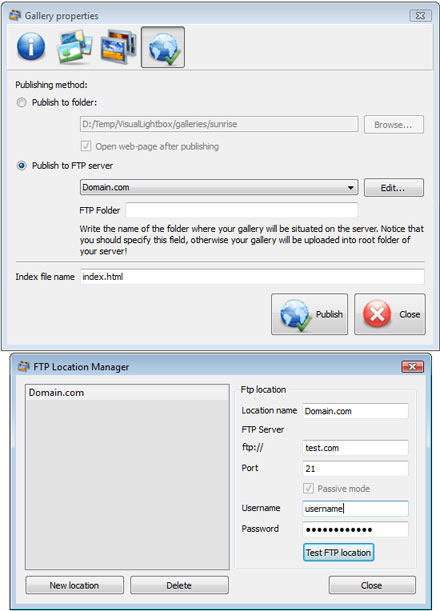
You are able to add a new FTP site by clicking "Edit" to the right of the "Publish to FTP server" drop down list. FTP Location Manager window will appear. Now type in a meaningful (this is not the actual hostname) name for your site and fill in the FTP details in the gallery javascript exemples appropriate fields. You will have to type in your hostname, e.g. domain. The fancybox in dreamwaver FTP port is normally located on port 21 thus this has been prefilled for you already. If your web site uses another port, you will have to enter it here.
Type in your username and password for the javascript effect on popup window connection. If you do not fill in this information, JavaScript Image Gallery is unable to connect to your site and thus not able to upload your gallery to website. If this site enables anonymous connections, just type in anonymous as the username and your e-mail address as the a javascript onclick popup password.
You might want to change the center web popup Directory as well if you need to have your javascript gallery in cakephp uploaded images placed in e.g. "www/gallery/". You can specify it in the FTP Folder field on the Publish Gallery window.
Notice: Write the name of the folder where your website gallery will be placed on the server. Notice that you should specify this field; otherwise your website album will be uploaded into the root folder of your server!
Step 6. Save your photo gallery as project file.
When you exit JavaScript Image Gallery application, you'll be asked if you want to save your project. The project consists of the pictures you choose to put on your web photo gallery and all your settings. It's a good idea to save the project, because that will allow you to change the project in case you decide to do something different with future galleries. So click Yes, then enter a name for your project. To select the location of your project, just click the Browse folders button and choose a different location. Then click Save.
Step 7 - Add gallery inside your own page.
JavaScript Image Gallery generates a special code. You can paste it in any place on your page whereyou want to add image gallery.
* Export your LightBox gallery using JavaScript Image Gallery app in any test folder on a local drive.
* Open the generated index.html file in any text editor.
* Copy all code for JavaScript Image Gallery from the fancybox dhtml HEAD and BODY tags and paste it on your page in the HEAD tag and in the place where you want to have a gallery (inside the BODY tag).
<head>
...
<!-- Start JavaScript Image Gallery.com HEAD section -->
.....
<!-- End JavaScript Image Gallery.com HEAD section -->
... </head>
<body>
...
<!-- Start JavaScript Image Gallery.com BODY section -->
.....
<!-- End JavaScript Image Gallery.com BODY section -->
...</body>
* You can easily change the style of the templates. Find the generated 'engine/css/vlightbox.css' file and open it in any text editor.
Download jQuery Photo Gallery
| for Windows | for MAC |
Visual LightBox is free for non - commercial use.
A license fee is required for business use. Visual LightBox Business Edition additionally provides an option to remove the VisualLightBox.com credit string as well as a feature to put your own logo to images. After you conclude the payment via the secure form, you will receive a license key instantly by email that turns the Visual LightBox Free Edition into a Business one. You can select the most suitable payment procedure: bank transfer, check, PayPal, credit card etc.
open center popup in javascript
|
| |||||||||||||||||||||||||||||||
Support
For troubleshooting, feature requests and general help contact Customer Support at  . Make sure to include details on your browser, operating system, Visual LightBox version and a link (or relevant code). automatic pop up window delayed ajax
Feedback
* I tried Visual LightBox and for me its a very cool and usefull application. Its so easy to manage my galleries and it looks very nice.
* I just tried the application, It is wonderful idea. Like you said in the website "few clicks without writing a single line of code" because most of the people is not web designers".
* I have just bought this product and think it is great. As it is extremely easy to use it is something I could get my clients to purchase to upload their own portfolio and latest projects etc.modal mac ajax html
* I have purchased the business and LOVE IT..Your product appears easy to use and close to what I need to help several of my clients..
FAQ
Q:In previewing some of my own slides on the browser, I find the background (thumb nails visible) too busy and distracting. Is there a way to darken the background?
A:You may set the following parameter in engine\js\visuallightbox.js file in a such way:
overlayOpacity: 1, // controls transparency of shadow overlay
DEMOS


Screenshot


Blog
Best Website Builder for Churches, Authors, Consultants, Magazines
Best AI Website Builder - Create Website Design with AI
Best Website Builder for Education, Software Companies, Designers, Videos
Website Builder for Beginners, Bloggers, Writers, IT Companies
Best Website Builder for Digital Marketing Agencies, Travel Agencies, Interior Designs
Awards